
 Full of stuff:
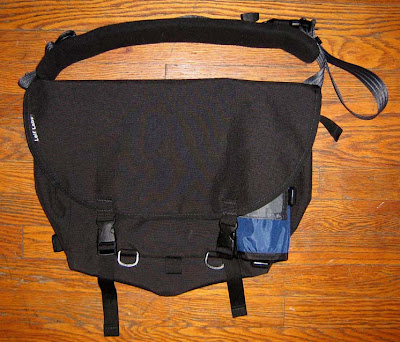
 I'm debating on whether or not I should make the flap longer. I really like attaching the buckles to the edge of the flap--it makes more dynamic sense to me...but it feels kinda short sometimes. There's always the flap-extender piece option, but that seems kinda goofy to use... Maybe I'll offer a longer flap as a choice. We'll see.
  And my model-sister here. This bag's about the size of your typical bookbag.
 I don't have the back pad in...so it's kinda floppy.
I'm not quite set on a design for my bottle holder yet. I going to try something different next time...actually I still have to make one for the Traffic Cone bag... I really like the way it attaches to the bag, though--the loop and tri-glide: solid. You could also have a pump holster there, or a camera case...or anything smallish you want to strap to the bag. It kind of lies in that purgatorial area of coverage and exposure, though...which I haven't quite determined if I like or not. I'm sure, like most things, it offers a bit of good and wicked.
 Pop! it comes out.

Pop! it comes out. Close up on the strap buckle. That webbing across the buckle keeps the pad from sliding all over the place...without impeding buckle-release. Kewl. Oh, that's a Quik-Slip Keeper there from National Molding/Duraflex just below the buckle...keeping the end of the strap from waggin' all over the place. Right now I'm looking for the best places to put one. I like it there on the very end...where I think Pac also puts theirs. But, hey, they're easy to take off, so you can put it wherever...or not even use it...do thee ol' wrap and tuck.  Compression strap close-up. And this is where the shoulder strap attaches to the corner of the bag. Note the bartacking there.
  The back pad pocket. This is the one for the previous bag...I just forgot to put these pictures on that post. Same design on this bag. About 8x10.
 No Velcro required. Just pops in. There's a little lip on the top that keeps the pad in there.

Compression strap close-up. And this is where the shoulder strap attaches to the corner of the bag. Note the bartacking there. The back pad pocket. This is the one for the previous bag...I just forgot to put these pictures on that post. Same design on this bag. About 8x10. No Velcro required. Just pops in. There's a little lip on the top that keeps the pad in there.


 Third alteration: Removable back pad--slash--document pocket. I've needed to do this for a while...I've just been lazy. Now you can remove the pad if your back's gettin' all sweaty...or you just have a fat back. This is a better design all around. Before I was just throwing the pad in between the liner and the shell and it would stay put pretty well but not super. And you really want padding at the bottom part of the back...so there: stay put! And I made the front pocket a little smaller...but not small enough, as it's kinda saggy.


 Snazzy.


