Tuesday, April 24, 2007

Cap

Mmm, my first cycling cap.
Now I can do something with all my thrift store dress pants. Ha.

Monday, April 23, 2007

New Backpack!

Side Loader 5
12x17x5 4/2007 Top Gun poly & 1000d Cordura
Here’s a little backpack. It’s so cute. Ha. In prototype green.
Backpacks are tricky creatures, indeed. And I really haven’t had too much success with the side-loading design in the past, but I figured I’d give it one more go…and it turned out really well. Yay.

Friday, April 20, 2007

New Backpack. Woo!

Top Loader
18x21x7 4/2007 Top Gun poly & 1000d Cordura
This is my first folded-top backpack…and probably my best backpack to date...or at least my most comfortable. The top loader really isn't the most convenient backpack in the world, but it'll hold a lot of stuff.


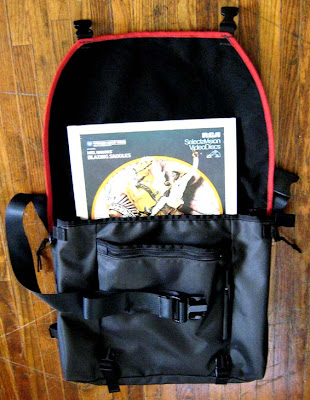
Gadzookers! that's big...

Thursday, April 12, 2007

Some Things I've Made

Bags & Mittens

(Dimensions: width/flap length, height, thickness)

Proto Moto
21x11x10 2002/3
This is the first bag I ever made. I think it took me about a year to design and sew—using a sewing awl. Ha. It’s more comfortable than my TimTim…but big messenger bags really only make sense on the bike. I think I was starting to get scoliosis walking to class wearing this. Maybe I should’ve put a waist strap on it…I think I made loops for one… Features: three-layer construction (1680d luggage-grade ballistic-weave nylon, 14oz vinyl-coated polyester (your messenger-mandatory “truck tarp”), 500d Cordura Natural), half-suspension split strap with Kevlar reinforcing…blah, blah…


Pack
15x20x10 2004
This is my first backpack…also made using a sewing awl…god… I wanted to capture the easy-in/easy-out qualities of a messenger bag but with the load distribution of a backpack. It has this goofy feature where you can hook the shoulder straps up diagonally and swing the bag around to get into it. It looked good on paper, but it’s way too cumbersome for practical use. I don’t know what I was thinking. Ha!


Bike Pack
13x21x8 2007
Let’s see, this is my fourth—no, my fifth backpack. It’s pretty cute. And I like how it hangs. I made the straps way too fat, though…and the adjustability feature is unnecessary. And I screwed up the compression strap angles. And the opening is too small… Oh well, it’s just a prototype…I’ll still use it.


The Trunk
24x12x10 3/2007
I got the itch to make a big messenger bag while I was designing the Bike Pack, and here’s what I came up with. There are a million little things that need to be adjusted, but I’m really happy with the overall shape of the bag. Messenger bags are worn asymmetrically, so why shouldn’t they be asymmetrical in shape. This bag really stays put when I’m riding—I don’t even need a cross strap—and I think it’s because the bottom of the bag is more perpendicular to my spine. It’s made out of this acrylic-coated polyester marine fabric called Top Gun (ha), which is used for boat covers ’n’ stuff, and it’s been really water resistant so far. I don’t know how it’s going to hold up to abrasion, though. The fabric core is white, and the corners of the bag are starting to look a little hoary…so we shall see.


Mini Mess 3
15x12x5 10/2006
My friend got married. This was a wedding present. One of a pair. I’m more of an embroidery kind of guy, but I figured I’d do some appliqué for mah pal. 1000d Cordura.


Mitts
c2003
Who likes to ride in the winter? I do, I do. This is my first pair of mittens. Gore-Tex shell, neoprene liner, Thinsulate (which needs to be lined or it falls apart—woops). It’s a pretty unconventional design (read: dumb). I wanted the mitts to be in the shape of a hand gripping a handle bar…not so good. People have been making mittens for centuries…I should’ve gone with a tried-and-true design.


Mitts Two
2004/5
I was gonna make some Bullwinkles [these are over-the-handlebar finger warmers. You see them on motorcycles and bicycles in the Ididabike race. They look like moose antlers] but I made some over-the-mitten mittens instead. Ha. 500d Cordura, 1000-weight fleece (I think).


Horsie
c2005
This was for my sis. Corduroy, 500d Cordura, nylon pack cloth.


Spain
2006
This is my first framed pack. I made it for my trip to Spain, where I walked a third of the El Camino de Santiago pilgrimage route. (Leon to Santiago.) I learned a lot about what not to do when making an internal-frame pack—most of it when I got to Spain. Ha. It took a couple of days to break in (or for my body to break in), but there were magic moments when it felt like I was carrying nothing. It’s a pretty simple design: Roll-top, removable side bags, nylon pack cloth with ballistic bottom, two-buckle removable waist belt, water bladder…
One time I came across this Australian packmaker’s website and it was like, Our bags are long enough to be used as emergency bivy sacks. No way! I’m doing that. Ha ha… I’ll have to find that site again…they make nice bags…


DJ Bag
18x14x5 4/2007
This is a record-haulin’ bag I made for my pals at
Permanent Records 1914 W. Chicago Ave.
Neat-o. Top Gun polyester, untreated Sunbrella lining.


Laptop Sleeve
3/2007
Everyone has a laptop sleeve. I wanted one, too.
I used cheap-o camp pad foam.


Manatee
13x10x5 2005
I made this for my dear friend Brianne. This is the first bag I made on my Sailrite machine. And my first small shoulder bag. Pretty nice. It’s lasted two years so far.


Green Bag
13x10x5 2005
Trying out a new corner design. It’s very purse-like…


Wednesday, April 11, 2007

Bedroom Bag-Making: An Adventure in DIY Design

Hey, here’s some info on making messenger bags ’n’ stuff…’cause there’s nothing cooler than making something you use every day. I’ve still got tons to learn about sewing, but here’s what I’ve figured out so far…

Getting Started
Okay. Probably the first thing you need to figure out is what you’re gonna put your bag together with. If you have access to a heavy-duty sewing machine (more on these later) that’s great, skip ahead… But if you don’t, well…
If you have your basic home sewing machine for making quilts and hemming pants, here’s what you’ll probably be able to do (or, this is what I could do with my mom’s machine—ha): You can sew through one layer each of 1680d ballistic-type nylon, 14oz vinyl-coated polyester, 500d Cordura, and some grosgrain…but your machine will want to die. I think it is possible to make a bag from 1000d Cordura using a home sewing machine with a jean-needle setup, but you’re gonna have to pay special attention to where you put your seams, and attaching the strap webbing could be an issue. Plus, you might not be able to use a heavy enough thread. (More on thread later.) But, hey, see what you can do.

If you don’t have a sewing machine a’tall and you want to make a bag on the cheap (and you have plenty of time), then you can always use a sewing awl. This is what they used to sew horse saddles back in the Wild West. It’s basically a sewing needle and bobbin on a handle. Your arm becomes the needle bar, and your finger the shuttle hook. It takes some time to get used to (and I think I got carpel tunnel) but I sewed two bags using a sewing awl. And I still use one to sew through thick foam and hard-to-reach places. Here and here.

Heavy-duty machines: I have a Sailrite Ultrafeed LSZ-1. It’s a semi-industrial, portable zigzag machine with walking foot. It’s pretty versatile—a bit on the small side, though. (I know, it’s portable). But I have a small room, so it works out. And it has a hand crank…which is awesome.
Also, Sailrite sells a bare-bones canvas machine for about $350.

And I believe the Sailrite Ultrafeed machines are improvements on Thompson machines. There are some other copies out there, too. Check out All Brands for more info.

The Ultrafeed is a pretty good portable machine. But if you want a full-on industrial machine, I recommend getting a walking-foot, needle-feed upholstery machine like the Juki DNU-1541S (which I own), Tacsew T111-155 (which I also own), and Artisan 618-1SC. And if you just get a walking-foot machine, make sure the walking feet have teeth on 'em for better feeding. Also make sure it can handle a large needle. You need a size 19 or 20 needle to sew T90 thread.

Expect to spend around 800 to 1500 bucks for a new machine (which includes head, table & motor)...and a little more if you get a servo motor, which is a definite upgrade over the standard clutch motor, as far as I'm concerned.

And buying a used industrial machine is always an option. I've never done this before, but I recommend buying a rebuilt one, unless you have a chance to try it out first. Check out National Sewing Supply for starters.

See another post of mine for some ramblings on sewing machines.

If you want to go cheaper, check out eBay for old all-metal heavy-duty machines. I saw an old Bernina 811 Sport the other day that looked pretty slick.

Do you have a pop riveter? You can use this to attach your webbing to your bag. I don’t have one, but the idea’s appealing (for aesthetics). Hey, it works for blue jeans.

Okay, so you’ve got your stitchery machine figured out, now get some fabric. The fabric of choice for most bag makers is 1000 denier Cordura nylon. Though, depending on where you live, you might not be able to go out and buy heavy-duty fabric off the shelf. The Jo-Ann Fabrics here in Columbia sells like 8oz canvas duck and probably upholstery vinyl, but if you want something heartier, off to the Web. Oh, and speaking of web…if you are just making a lightweight canvas bag or one out of blue jeans, Jo-Ann does have webbing and buckles, but they kinda stink. Your local camping store should have some of a more suitable quality.

Here are some online sites that I like. EBay also has a lot of little fabric stores, too.

Outdoor Wilderness Fabrics, Inc.
Your one-stop bag-making super store. Great staff, great prices. I really like their buckles, webbing and foam. I’ve had mixed results with their thread, though. And their nylon seatbelt webbing is not real seatbelt webbing…it’s just bad webbing.


Rockywoods Outdoor Fabrics
These guys probably have the best selection of 1000d Cordura on the Web. Excellent prices, too.

Rochford Supply, Inc.
This is a big upholstery warehouse store that has lots of inexpensive fabric seconds ’n’ stuff. Awesome prices. A large selection of marine-grade fabric.

Sailrite
Lots and lots of colors of Sunbrella and other marine fabrics. Lots of binding colors, too. Top-quality thread. Sweet sewing machines. Check Perfect Fit first, though. You can usually get stuff cheaper there. And you can usually get their sewing machines cheaper elswhere, too.

Perfect Fit McDonald
Another big upholstery supplier. Lots of awesome stuff and good prices. Amazing color selection of Coats #92 poly thread. And their Cordura is the best deal in town...but they only have basic colors...it's listed under Recreational Fabrics or something…just use their search engine for whatever you’re looking for…
If you want some exotic Cordura colors, check out Rocky Woods.


Seattle Fabrics
They’re kinda pricey, but they have nice stuff.

Who Makes Cool Bags?

Aerostich

Alchemy Goods

Archie's

BagJack

Bailey

Banjo Brothers

Belk

Bilobicles

Black Star Bags

Blicks

Burro Bags

Chrome

Cocotte

Courierware

Crank

Crumpler

De Martini

El Divino (Santiago, Chile)

87 Bags

Fredrik Packers

Freight Baggage

Freitag

Headporter

Jandd

Lazy Monk

LoveLife

Manhattan Portage

Mer

Michael Linnell (under "Satchels")

Modulab

Nari/Furi

Needlefeed

Norman Porter

Pac

Polipo

Project Tortoise

Push

R.E.Load

Resistant

SAG

Seagull

Shag (Dank Bags under new management) You have to go to Milwaukee for one.

Tandey Bags

Timebomb

Trash Bags

Transient

Under the Weather

Vaya Bags

WIG

Zo

Zugster

Backpacks

Boblbee

Lemolo

McHale

Mystery Ranch

Ortlieb

Wilderness Equipment

Other Bags

Epic Designs

Carousel Design Works

Acorn Bags

Patterns Galore!
There are about five-hundred thousand ways to put a bag together. I’m going to talk about a few. The main difference between these designs is how the shoulder strap is attached to the corners of the bag. For me, this is the A-number-one aspect of the bag design. It sets the lines of the bag, ensures a good fit, and determines whether water is gonna pour in yer bag or not.

I’m sure someone has named these designs already, but this is what I’m going to call them…

The Simple
This is the design you see the most. In my opinion, it works best for smaller bags. And if you’re not careful you’ll get holes at the corners of your bag. Yeeps.


This pattern makes a bag 20x10x6, a nice small/medium size.


Quick instructions: cut it out, finish the lip edge, put on the strap, sew the sides, cover the side seams with grosgrain (this will also cover the flap edge), sew the bottom and finish the edge. Done.
Note: This has a half-inch seam allowance.

Look at the diagram on the right. See how the side seam becomes the flap edge with that little flip there. Isn't that neat? Ha.

This is the most stripped-down a bag can be. You'll probably want to add inside/outside pockets, maybe a zipper, flap buckles, a key loop, reflectors, bike-light loop, velcro, a liner, an extra bottom layer, strap pocket, back pad, baby carrier, shoulder pad, hip pad, waist strap, cross strap, x-strap, radio loop, tube holder, gun holster, compression straps, flap extensions...

The Simple Plus
This is pretty much the exact shape of the Simple but you attach the top of the shoulder strap to the back of the bag instead of the side. And you attach the bottom of the strap to the side of the bag—but at an angle. (Or you can just attach the strap on the back at both corners.)


This has a more water-resistant corner than the Simple. (And it's more aerodynamic, too. Ha.)


Again, this makes a bag 20x10x6. (Half-inch seams.)


See below for the best stitch patterns to use when attaching your straps.


I have a step-by-step instruction post for this design here. Yeah!


Suspended
This is a super fancy variation of the Simple Plus design. You attach your shoulder strap to the back of the bag, but not at the corners. At the corners you attach ladderloc buckles that run suspension webbing from the shoulder strap. This design allows you to expand the bag to carry large loads while keeping your shoulder strap wrapped round you tight. Too chic.

I've writte another post about positioning the bag straps here. Enjoy.


I think it's probably easiest to put the suspension straps in the side seams. You can also make the following Folded design into a suspension bag. Read along for shoulder strap ideas.

Folded
This is kinda like the Simple Plus, but not. You move the side seams more towards the middle, and fold the sides of the bag in at the corners and sew. This one’s kind of a pain in the ass to put together, but I like it the best.


This is a weird one. You should probably first make it in paper before you cut your fabric, just to be sure everything lines up.

Look, no chance for holes in the corners.

Quick instructions: Finish the lip edges, fold and sew the corners, add binding tape/grosgrain to the flap and corners, attach the strap (the hard part), sew the sides, then the bottom. (The pattern is drawn with half-inch seams, but with the Folded you can make 'em whatever size you want.)
Go here to see me make one of these.

Seamwise
You can put your shoulder strap in the seam if you want, but I’m not a fan of this design. One, I’m not comfortable with the angle at which the bag sits on your back—it’s too vertical. And two, you’re probably not going to be able to take the Simple and slip a shoulder strap in there. That bag only has a half-inch seam allowance there at the corner and I don’t think that’s enough to hold a shoulder strap—even if you do pour a ton of stitches into it. (Unless you sew through all nine and a half layers of fabric…or use a variation of the Folded…but see reason number one again.) You’re gonna need some seam magic. See Crumpler for more info.
Editor's note: You know what? I've been thinking about how awesome it'd be if you could just slip your shoulder strap in the side seams and it'd be strong enough. Wouldn't that be easy? That'd make this a good bag for beginners (instead of a bad bag for everyone--ha). So here's what ya gotta do: Stick two inches of webbing in the seams and then sew that two inches of webbing to the back of the bag--on the inside. That'll take some of the stress off the seams. Genius. So simple. Here's the catch, though: Unlike the Simple, you can't run a continuous length of grosgrain webbing from the inside seams and around the flap. You have that webbing in the way. You'll have to do it with like five overlapping pieces. Sounds bad, but it isn't. Yeah! Maybe I'll draw a picture some day...


So these are the basic patterns. Like I said, there are more out there (e.g. Chrome). Take a look at other bag designers’ work and use what you appeals to you. I like to make my patterns out of grocery bag paper and duck tape. That way I can fill them with stuff and get an idea about how they’ll act when full. And people who're passing by and happen to look in your windows will think you're nuts for walking around with paper bags on my back. Yay!

Shoulder Straps
There are basically two different types of straps: ones you can separate, and ones you can’t.


Split-Strap
Personally, I like these the best. When you’re carrying a bunch of stuff and you have a helmet on, just release the buckle and you’re free. They’re also a little bit easier to adjust on the bike.
I use a two-inch acetal side-release buckle (SRB) made by ITW Nexus. You can use Duraflex Stealth buckles if you want (they’re super smooth), but when it’s really cold out they break…or at least that’s been my experience…this could be because they were of the nylon variety…I dunno. And now that I think of it, my roommate had a Lowe Alpine pack with a broken Duraflex buckle on it…hmm… Make sure your buckles are made of acetal. You can also use airplane seatbelt buckles, parachute buckles, and other metal lift-tab buckles…but I’m warning you, if you put a push-button seatbelt buckle on your bag, some asshole is probably going to push it when you’re carrying fifty bottles of beer and a kitten…

One-Piece
These are pretty popular, too. The only advantage here that I see (besides simplicity) is that you can use super-stiff resin-coated scuba webbing and cam- or metal cinch buckles. I don’t like cam buckles that much—they tend to pop open when I don’t want them to, and they poke me in my ribs with their sharp corners…but I am especially skinny. Hey, it’s your call.

The X-Strap
This is a variation of the split-strap—or more like an addition. It turns your messenger bag into a backpack…only cooler, ’cause you’ll have an X on your chest and people’ll think you’re with the X-Men ’n’ stuff…um, or not. Anyway, look at the drawring.
Pretty sweet.


Things to Consider

Sewability
This is at the top of the list for a reason. I just made a bag where I sewed through all this stuff at once: two layers each of 11oz fabric, 9oz fabric, seatbelt webbing, flat-weave nylon webbing, and some binding tape. That was a pain in the ass. Why’d I do that. Because I’m dumb and I wasn’t thinking about whether I could sew it when I was designing my bag. You can design the coolest bag ever, but if you can’t put it together, there’s no point. Think about how many layers of fabric you’re going to have to sew through, how easy the seams are to sew (i.e. do you have to turn corners—tight corners are no fun with wide seams), and how easy you’re going to be able to move your fabric under your sewing machine. I have a pretty small machine and I’m not sewing one-piece bags no mo’ on it. No way. Too hard. I can do it, but my box stitches look like shit and I ’bout break a needle every two minutes. [Editor's note: I lied. I've been making one-piece bags recently. I just don't use x-box stitches--only bar tacking. Yeah! ...actually, lately, I've been using the hour-glass pattern when I use my 111 machine. [Note: Again, I've changed my mind. I'm currently using the struck-through Z pattern.]]

Hook&Loop
I don’t like Velcro: the sound irritates me, and your sweaters get caught in it. Plus it has the self-destructive tendency of picking apart fabric and webbing around it. So if you’re gonna use it, be smart: Don’t skimp here: buy Velcro-brand hook&loop. And put the hook (hard) side on the body of the bag and the soft loops on the flap. And it’s best if the flap liner around it is a really tenacious fabric or vinyl.

Thread
The thread’s probably the most important part of your bag, so get good thread. I haven’t tried a whole lot of brands (because it takes me forever to use an 8oz cone), but Coats Ultradee is good (aka Dabond). And I just got some A&E, which seems really nice.
Use at least N92 thread. And if you want to be super-awesome, use N138. I use N92 because I’m a bum and haven’t bought a size 22 needle yet…and I don’t want to change my bobbin all the time. Ha.
If you don’t want to have to order thread, go to the store and buy Coats nylon upholstery thread in the little 150yd spool. And I just compared it with the N92 that I have and they’re about the same size. So you should be able to use N92 on your home machine with a jean needle. If not, go down to N69.
Polyester or Nylon? Polyester is naturally UV resistant and nylon’s not. But nylon is a little bit stronger. So if you’re going to be out in the hot-ass sun all day near the equator and your bag has exposed stitches, go with poly. I use poly because I’ve found it to sew better on my machine…but the nylon I was using before had some weird coating on it that would build up on the needle and cause the machine to skip stitches…so I don’t know…hmm…

Stitch Length
You want to have about 6 to 8 stitches per inch. Get out your ruler. Too few and you get a weak seam. Too many and you can get a weak seam (think perforated paper) and have puckering problems--I do this way too much.
And put at least two stitches in your seams—three’s better.

Exposed Stitching
I’m probably being a bit weird with this one, but I don’t like exposed stitching that much. It’s raised above the fabric a little bit and wears thin pretty fast if it’s in an area that gets a lot of use. However, it does make a seam stronger… But really I don’t like doing it because I’m a sloppy sewer and I hide all my stitches on the inside. Ha-ha!

Bar Tacking
If your machine can do zigzag stitches then you should put bar tacks in high-stress areas like pocket corners and where webbing is attached. I’ve been using bar tacks lately to attach my buckles to the flap. It’s less of a hassle than the x-box pattern and, I imagine, just as strong.

Stitch Patterns
Okay, I just mentioned the x-box pattern up there. Classic. You see it a lot. You also see the Z pattern a lot too, which is easier to sew. With your shoulder strap, you’re gonna want to use an x-box with rounded corners, ideally. I mean, you don’t have to, I guess. And maybe the best stitch shape would be a catenary curve, but I haven’t tested that scientifically yet. Ha. Rounded corners distribute the stress more evenly than regular corners (where you can get a lot of stress on one stitch, which usually breaks). And since the spot where the shoulder strap connects with the bag is the Achilles' heel, make those stitches strong.
And with the Folded bag design, well, I told you it was a pain to sew, but here’s what I’ve come up with so far… That's it up there on the right. It's pretty easy to sew, and it looks cool. The one on the left is the x-box with rounded corners.

Floating Liners
It’s like a bag in a bag. This is a nice feature to have: the outside seam doesn’t go to the inside of your bag so water won’t leak in through the seams—or it takes a long time to do so…provided you have a somewhat water-resistant liner. And if you want a totally waterproof bag, you’ll seal your seems. PVC glue scares me, so I don’t use it. But some vinyl is heat-sealable. And there’s heat-sealable thermodynamic polyurethane (TPU) nylon, too. But maybe you have a radio frequency welder… Or you could use duck tape. You know what: I think I’m going to try this…

Anyway...these are kinda tricky…and I’m sure there’s an easier way to make these out there, but this is how I do it.

The Simple: First of all, I think it’s a good idea to sew through both the liner and the shell when you’re attaching your shoulder strap. It’ll be stronger, and I don’t think you’ll lose too much waterproofness. The side and bottom seams are the ones that let the water in. But if you don’t want to, that’s fine.
Okay, here we go… You basically sew the sides and bottoms of the two bags (shell and liner) as if they were separate bags, sew the two flaps together, turn the shell right side out, and sew the two bags together at the top. Poof! You have a bag with a floating liner.

The Folded: Sew the flaps together first. Then sew the sides and bottoms. Turn the shell right side out, and sew the tops.

Corner details of the Simple.
Before you turn it right side out, and after, when you've put your binding tape on the lip.


Here are some diagrams for the Folded with liner.
Sew the flaps together, put some grosgrain on the corners there, fold the corners and put the grosgrain ribbon on the flap and corners.


This is what it looks like when you've sewn the sides and bottoms, but haven't made it whole yet. (Note: bags aren't to proportion.)


Now it's whole. Make like you're hemming jeans when attaching the tape to the top there.


Compression Straps
Let’s see, what should the rule be… If your bag is more than six inches thick you should probably put some compression straps on it. This keeps the bottom from sagging. I like to have three. But maybe you like saggy bottoms…

Proportions
Hmm, this will determine how your bag acts when you’re carrying big things like boxes.
Look at the diagrams below. Depending on what pattern you choose, you can adjust the length of the front of the bag a bit—how big the lip is.
If you’re going with the Simple, the lip of the bag minus two times the width of the shoulder strap should equal the flap length. Math. Just make it look like the diagram over there. See how all the corners of the opening are square when you pull the straps apart.


If you go with another design, you can make the front a little bit wider than the flap—but not too wide or you’ll get holes in your corners. This is why you make paper bag patterns first.

You can also adjust the height of the bag in relation to the back. If the front of the bag is shorter than the back, the bag’ll fit a little bit better when there’s a big box sticking out of it because the shoulder strap won't be pulled away from your back so much. And this is why the Suspended design was invented.


This is what happens when the lip is too big for the flap. Badness happens. You get loops in your corners, and not only does it look dumb, but rain likes to go in there, too.
I see this a lot.


This is a Folded design with a longer lip and shorter front. You can do this on the Suspended and Simple Plus, too.


I like to make the lip a lot wider than the flap and then put compression straps on the sides or front so I can cinch the bag closed when it’s empty.


Cross Strap or Waist Belt?
Some bags have one or the other…some have both. A cross strap is a stabilizer strap: it prevents your bag from swinging round front when you don’t want it to. A must when you’re riding. A waist belt does the same thing, plus it distributes some of the weight to your hips. A cross strap is easier to put on than the waist belt…less sewing, less angles to figure out…blah. I still haven’t worked out a surefire belt design yet.... Pac Designs has a nifty belt. And if I remember correctly, Push used to have huge belts on their bags…I think.

Zippers
I use #5 YKK Vislon zippers. I like ’em. They have molded teeth. Don’t be afraid of zippers. Putting zippers in bags is way easier than putting them in skirts.

Shoulder Pads
You know: shoulder pads are nice. But I am not a fan of sliding shoulder pads. I think they stink. Sew your pad to your strap, or put something on it to keep it from sliding. However, they are convenient on smaller bags that can be worn as a messenger bag or a shoulder bag. But in this case I much prefer a pad that has a triglide at one end and a SRB at the other—or triglides on both ends. (See diagram.)
I always see people wearing their shoulder bags and their pads aren’t even on their shoulders. Hmm…
I like to make my pads out of 3/8-inch closed cell foam. (I get it from OWF Inc.—see above. It’s the perfect density and easy to work with. I think it shrinks a bit with age, though.) You can use camp pads if you want. Some are better than others. I usually use pack cloth or Cordura for the top of the pad and 100-weight fleece for the bottom. The fleece is stretchy, so I can pull it when I’m sewing. This makes the pad curved and prevents the fabric from wrinkling against my skin. Very nice. If you want something tougher than fleece, I believe OWF sells Spandura—stretchy Cordura—which would probably work okay.
And while we’re talking about pads… Back pads are a nice thing to have, too. Those blue camp pads you can get at the Wal-Mart for six bucks work very nicely for this application. They’re stiff, squishy and cheap. Bang.

What size?
This is how I fit my bags: Measure from your shoulder to a couple inches above your opposite hip. This is about how wide you want your flap. I like my bags to wrap around me a bit when they’re empty, so I make ’em a bit longer. Around twelve to fourteen inches is a good height. (I actually first started using a messenger bag because I needed a record-sized bag to carry my LPs to my college radio show. Ha.)


Woo.

Happy sewing!