I've been working on a DIY rain barrel diverter for a few years now and have made two prototypes so far. Just got #2 up in my gutter lab:
Below is our off-the-shelf diverter. It does the job (though, this our second one -- the first one fell apart after, like, a year ... I think they beefed up the build for this version). But the extreme pain in the ass of pressing the hoses on each year has made me look for one with screw-on hoses.
Last year, I made a quick & dirty diverter from a soda bottle:
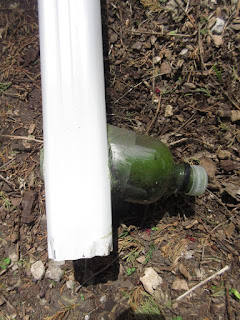


This got water into the rain barrel but was ultimately a fail. You can't easily clean it out and we have too much leaf litter falling into our gutters for that. And I misremembered how close soda bottle threading is to hose threading -- not that close.
So, version two. Goals:
> Made from inexpensive, easily obtainable materials
> Screw-on hoses
> Easy to clean out
> Easy to build
I'd say there are two kinds of rain barrel systems: ones where the overflow goes down the gutter downspout and ones where the overflow goes out a hose on the side of the rain barrel. The first kind requires a diverter, the second kind you can just run the downspout straight into the top of the barrel. I like the diverter system since most of our downspouts feed into drainpipes.
So, this is pretty simple. A large plastic peanut container, some smaller pieces of downspout screwed together where they overlap and attached to the container on the sides with screws, and a brass bulkhead fitting. And some gutter adhesive to seal around the downspout.
When the rain barrel is completely full, no more water can go down the hose so it rises and goes into the downspout. I probably should've made the lower downspout sit a little farther down so it doesn't have to fill up so much to start releasing water, but I wanted the upper downspout to be up high enough to get the bulkhead fitting out, and to be able to clean out any sticks that fall into the spout. I can probably get in there and cut the back part off if it becomes a problem.
We just had some rain. It works!
Thoughts:
I like that it's clear so I can easily check for blockage, and there's room for another bulkhead fitting if I want to add another barrel.
You could probably say this is 100% efficient. With some diverters, some of the water is always going to go down the lower downspout. With this, all of the water will go to the barrel before the downspout, unless it's a super-heavy rain. Bonus in droughty spells with light rain. Usually unnecessary since these fill up very fast during an average rain.
Most downspouts are routed against a wall. This design wouldn't work so well with that since the downspouts are offset. You could use some curved downspout to get around this, maybe.
The way the RainReserve unit, above, works is that the opening for the lower downspout is smaller than the upper spout, so water running down the sides of the spout falls around the lower spout and into the hoses to the barrel, even though the gutter is still inline. You could do this with the peanut diverter by bending in the sides of the lower downspout. In the current design the two spouts are screwed together where they overlap, adding some strength to the unit. I don't know if this container is strong enough to support the spouts if they aren't connected, so you'd have to figure out how to manage that. I'm thinking you could cut flaps in the downspout and push them in to draw the water out, leaving enough material in place for stability.
Anyway, we'll see if it lasts the summer!
:)


